Saturday, March 9, 2013

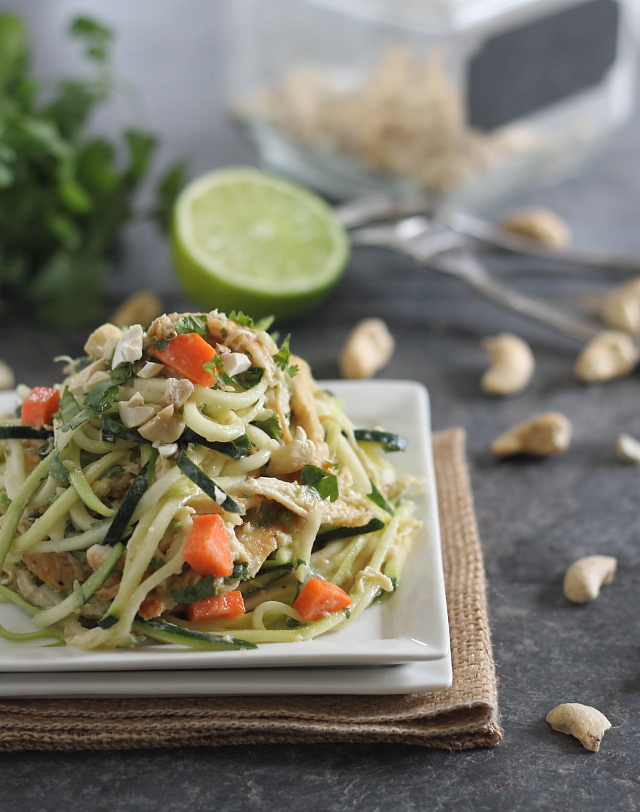
THAI CHICKEN ZUCCHINI NOODLES

I'm running back to the blog "Running to the Kitchen."  It's often hit or miss, but the hits are always big.  This recipe for a Thai dish using zucchini noodles is my new fave.  LOVE. IT.

Husband loved it, too.   Look it over, then I'll tell you how it can be modified.


THAI CHICKEN ZUCCHINI NOODLES

Prep time - 15 min. 
Cook time - 8 min.
Total time - 23 min.
A simple thai inspired chicken dish made healthy with zucchini noodles.
Author:
Serves: 2
Ingredients
  • 1 chicken breast
  • salt & pepper
  • 1 tablespoon coconut oil
  • 1 large zucchini, peeled/spiralized (I used a julienne peeler)
  • ¼ cup cilantro, chopped
  • 2 tablespoons cashews, chopped
  • 1 carrot, chopped
  • 1 tablespoon peanut butter
  • ½ lime, juiced
  • ½ tablespoon honey
  • 2 tablespoons coconut cream from a can
  • ½ tablespoon fish sauce
  • 1 teaspoon ginger, minced
  • 1 clove garlic, minced
  • ½ tablespoon jalapeno, minced
Instructions
  1. Heat a skillet over medium high heat and melt coconut oil.
  2. Season chicken breast with salt & pepper and once hot, add to skillet.
  3. Cook for about 3-4 minutes per side until cooked through.
  4. Remove from skillet and shred, set aside.
  5. In a small bowl combine, peanut butter, lime juice, fish sauce, ginger, garlic & jalapeno. Whisk together and set aside.
  6. Combine shredded chicken in a large bowl with peeled/spiralized zucchini, cilantro, cashews and carrots.
  7. Pour the sauce in the bowl and toss to combine.


OK, I replaced peanut butter with almond butter.  Forgot at first to add the honey and coconut cream because it's not in the instructions, so I had a good before and after taste.   Coconut makes it creamier like you'd expect from a Thai dish.  That, and honey, make it sweeter, but not so much that you can't leave either of them out.   Try putting those two ingredients last and see the difference for yourself.

Enjoy!  Making it again tonight.

Saturday, March 2, 2013

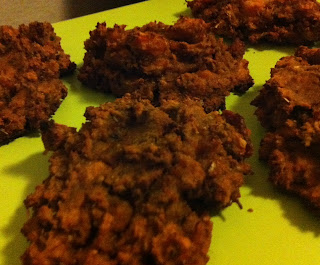
SWEET POTATO BACON BISCUITS

First, let me say anything that pretends to mimic bread never does it for me.  I have to get out of my head that this is a biscuit.  It's not.  It is it's own Paleo thing.  I'm coming to terms with that.   But I'm always interested in the food on the blog  Running to the Kitchen, so I tried her recipe.

Now, do I like it?  Yes.  No.  Not sure.  I guess.   It has a lot of possibilities, but I have to wait to see how these fit into a real meal.

They're tasty but a touch over-powering.  Lots of strong flavors:  roasted garlic, fresh rosemary and bacon fat.   Now with an egg in the morning, maybe it'll all fit in; but alone, something has to be cut back.


SWEET POTATO BACON BISCUITS

They have a crispy outside but a softer middle.  I would also like to consider this as a baked side dish.  Not separated into "biscuits" but as a casserole-style side dish.


Ingredients
  • 1 medium sweet potato
  • 4 cloves roasted garlic
  • 1 tablespoon bacon fat
  • 1 egg
  • 1 tablespoon fresh rosemary, minced
  • ¼ teaspoon kosher salt
  • ⅛ teaspoon freshly ground black pepper
  • 2 tablespoons coconut flour
  • ½ teaspoon baking powder
  • 1 slice cooked bacon, chopped
Instructions
  1. Preheat oven to 400 degrees.
  2. Wrap garlic cloves and sweet potato in aluminum foil (separately) and roast for 45 minutes for the garlic and about an hour for the potato (or until it’s fork tender). Alternatively, you can microwave the potato to cook it faster, but since you need to roast the garlic, you may as well roast the potato too.
  3. Remove from oven, let cool and then transfer 1 cup of the potato and roasted garlic to a medium bowl.
  4. Fry the bacon in a skillet over medium-high heat. Remove the bacon and let cool and pour 1 tablespoon of the remaining bacon fat into the bowl with the sweet potato.
  5. Add the egg, rosemary, salt & pepper and mix to combine.
  6. Add the coconut flour and baking powder and stir until thoroughly incorporated.
  7. Lastly, add the bacon and fold into the mixture.
  8. Reduce oven temperature to 375 degrees and line a baking sheet with parchment paper or a silpat.
  9. Spoon the batter onto the baking sheet. The biscuits won’t really change shape while cooking.
  10. Bake for 20-25 minutes until the edges start to turn golden brown.
  11. Remove from oven and let cool for a couple of minutes.
  12. Best served warm.
Next time I'll cut the garlic and make 12 small biscuits not six larger ones.   The original blogger says they're best served warm, but they're a lot of work for breakfast.  


UPDATE:  I woke up the next morning and not only were these biscuits soggy, but they were green.  Yes, green, as though the rosemary which I had chopped up (perhaps too finely in a grinder) had taken them over.  So disappointing.


Friday, March 1, 2013

Asian Chicken Wings with Egg Fried "Rice"

First I'm obsessed with every way to make cauliflower, namely the riced cauliflower in "Everyday Paleo."  I love it.  My husband loves it.  It makes the house smell good, too.

RICED CAULIFLOWER

1 head cauliflower
3 Tbs. coconut oil
3 diced green onions
2 minced cloves of garlic
1 whisked egg
1 tsp. coconut aminos or Bragg Liquid Aminos (I use Bragg)
1 Tbs. sesame oil 
Black Pepper

Prep Time:  30 minutes
Cook Time:  15 minutes
Serves:   5

Rinse and dry the cauliflower and cut into florets.  Put the florets in a food processor until they are finely minced like rice.  In a large skillet, melt coconut oil over medium heat.  Saute' cauliflower for 5-6 minutes.  Add green onions and garlic to skillet and saute for another 2-3 minutes.

Push cauliflower to the side of the skillet and pour in whisked egg.  Cook until firms then mix it into the cauliflower mixture.  Add Bragg Liquid Aminos, the sesame oil and black pepper.  Done!


Courtesy: Everyday Paleo


ASIAN CHICKEN WINGS

Wow.  What a great surprise this was.  Great for dinner and great for parties.  Just regular chicken wings sussed up.   Another great recipe from the cookbook "Everyday Paleo." 


2 1/2 lbs. chicken wings 

Marinade:
 2 cloves minced garlic 
1 tsp. grated fresh ginger 
3 Tbs. coconut aminos or Bragg Liquid Aminos
1 Tbs. sesame oil 
1/2 c. apple juice

Sesame seeds and minced chives or green onions for garnish

Prep Time:  20 minutes plus 30 minutes at least for marinating
Cook Time:  35-40 minutes


Preheat oven to 425 degrees.  In a large bowl, whisk together the marinade ingredients.  I put the mixture in a large Ziploc storage bag then tossed in the wings.  Let them set for 30 minutes, at least, but as long as two hours.

Line the baking sheet with foil then place the wings on it.  Don't crowd them.   Roast the wings for 35-40 minutes turning them halfway through.  I did 40 minutes total, but my husband thought they could have cooked another five minutes for a crispier skin.

When they're done sprinkle them with sesame seeds and chives or green onions.


Enjoy!  Easy and all of it is good cold, too!

Wednesday, February 20, 2013

Better Butter Chicken and Curried Vegetable Hash

I love Indian food. When I see Indian people, I crave Indian food. Clearly, I want it every day. The unfortunate truth is that it's always better in the restaurant. And, this recipe is no different.

I substituted Madras Curry Powder for the all the spices, because it seemed to have most of them in there, and it was far cheaper than purchasing them separately. I also had to use more coconut milk, because I didn't think there was enough to simmer my chicken in. The Better Butter Chicken recipe is here and pasted below.

I have made Butter Chicken before, and it was pretty close to paleo. You can find that recipe, here. If you can bargain on the cream, it can be paleo-ish. It uses Garam Masala, so maybe using that in the paleo recipe would make it better.

Curried Vegetable hash was very tasty, though. I ended up using an extra egg, because my sweet potatoes were quite large. It was a great compliment to the chicken, and actually brought the chicken up a bit, I thought. Couldn't find recipe online. Let me know if it's not in your huge-teeth lady book.  No pictures. Sorry. :)


Better Butter Chicken
2 1/2 lbs boneless chicken thighs
1 red onion diced
3 tbsp coconut oil
6 oz can tomato paste
½ can coconut milk
½ tbsp crushed garlic
½ tsp cardamom powder
½ tsp coriander powder
1 tsp fenugreek powder
1 tsp chili powder
1 tsp sea salt
4 tbsp ghee (clarified butter)
Cut the chicken thighs into bite size pieces and set aside. In a large skillet or soup pot, heat the coconut oil over medium heat and add the diced onion and saute until translucent.  Turn your heat down to low and to the onion and oil mixture, add the crushed garlic, cardamom, coriander, fenugreek, and chili powder and stir well to make a paste.  Add the tomato paste to the onions and spices and stir, this mixture will be very thick.  Turn your heat back up to medium and add the coconut milk and salt.  Use a whisk to blend the tomato paste spice mixture and coconut milk together into a thick sauce.  Bring the sauce to a simmer and add the chicken.  Return the sauce and chicken to a simmer, turn down to medium low, cover and cook for approximately 15 minutes or until the chicken is done all the way through – make sure you stir occasionally during the cooking process. After the chicken is cooked, add the ghee and mix into the sauce until melted.  Serve the chicken over steamed red chard or any other green of your choice.

Tuesday, February 19, 2013

Beef Stroganoff

OK, so, gasp, I haven't actually ever tried the "real" beef stroganoff. Even before my Paleo days, the concept never really appealed to me.

But, this sounded delicious when I saw the recipe. And, it came highly recommended from a friend.

I served over simple shredded zucchini that I sauteed in some of my favorite Paleo fat - bacon grease. The recipe lacks salt, but flavor it up to your liking and it will be delicious.


Beef Stroganoff Recipe

Serves 4

Ingredients

  • 1 lb top sirloin steak, cut into strips;
  • 6 tbsp butter, clarified butter or other paleo cooking fat, divided;
  • 1 medium onion, chopped;
  • 8 oz mushrooms, sliced;
  • 2 cloves garlic, minced;
  • 1/4 cup dry white wine;
  • 1 cup beef stock;
  • 1 cup coconut milk;
  • 1 tbsp fresh parsley, finely chopped;
  • Sea salt and freshly ground black pepper to taste;

Preparation

  1. Heat a large skillet (preferably cast iron) over a medium-high heat and allow 2 tbsp of your cooking fat to melt. Add the beef strips and cook on each side for just one minute, until golden brown and then remove from the pan and set aside. Don’t be worried that the meat isn’t cooked through, as it will return to the heat to cook again later.
  2. Repeat the above step, but this time cooking the mushrooms. They may require a minute or two longer, just enough time so that they begin to take a golden color. Once cooked, remove them from the skillet and set aside for later use.
  3. This time, repeat the first step, but with the onions and garlic. More cooking time will be required, as the onions need to become tender.
  4. Once the onions and garlic have cooked, leave them in the skillet and add the white wine. Cook for just a few minutes so that the alcohol burns off and the brown bits stuck to the bottom of the pan come up. At this point add the coconut milk and beef broth, stirring until a consistent creamy sauce takes shape.
  5. Return the beef and mushrooms to the skillet and allow them to simmer slightly for 5 to 7 minutes. You may need to turn the temperature down to prevent the sauce from boiling. Also be sure to check the beef, as you do not want to overcook it and make it chewy.
  6. Serve as is or on top of some spaghetti squash or zucchini noodles. Bon apetit!

Thursday, February 14, 2013

Mexican Chicken Stew

I got a new crockpot. It was only $35 (Costco sale, woot). And, it has revolutionized my crockpot-ing. It doesn't burn the food or dry it out. And, you can use the pot part to prep meat directly on the stove. Fewer dishes.

Now, I'm on the hunt for more crockpot recipes. I tried this Mexican Chicken Stew last weekend. I cooked it for my coworkers (let it cook in the break room all day). It was a risk to serve something I haven't made before, and it was a hit! People weren't sure what to make of the cauliflower rice. They thought it was couscous. Hilarious.

I used chicken thighs (because that can only make it better, and they are cheaper). And, I would just do cilantro and lime to taste, because I like a lot.


(her picture, not mine). 

I made it again at the beginning of the week, and it was a great meal to have around during a hectic week that included a traveling husband. And, it's all gone. 


Crockpot Mexican Chicken Soup/Stew over Cilantro Lime “Rice”
Ingredients
For your crockpot
  • 1 tablespoon olive oil
  • 1 lb chicken breast
  • ½ cup chicken broth (use a little more if you want it more “soupy”)
  • 1 (14 oz) can diced tomatoes
  • 1 yellow onion, sliced or diced
  • ½ (14 oz) jar of roasted red peppers
  • 2 cloves of garlic, peeled and smashed (just smash it was the side of a knife)
  • 1 tablespoon chili powder
  • 2 teaspoons cumin powder
  • 1 teaspoon oregano
  • 1 teaspoon garlic powder
  • 1 teaspoon salt
  • pepper, to taste
For your cilantro rice
  • 3-4 tablespoons cilantro, diced
  • 1 head of cauliflower
  • ½ lime, juiced squeezed
  • 1 tablespoon olive oil
  • pinch of salt
Instructions
  1. Pull out your hand dandy crockpot. People have been asking for more crockpot recipes so HEAR YA GO!!!! hooooooo ray!
  2. Literally throw all your crockpot ingredients into the crockpot. Mix around. Turn on high for 3.5-4 hours or until your chicken is shredable (is that a word?) with two forks. I love shredded meat.
  3. When your crockpot only has about 30 minutes to go, preheat your oven to 400 degrees.
  4. Pull out a baking dish to prepare your cauliflower. Pull off all the leaves and cut off the stem, then dice your cauliflower into smaller florets and place in baking dish.
  5. Sprinkle with olive oil and salt. Put in oven and baking for 20-25 minutes or until cauliflower is tender.
  6. Once the cauliflower is done cooking, grab your food processor with the shredding attachment. Add cauliflower and rice it up!
  7. Add riced cauliflower to a bowl. Chop your cilantro and add that right into your rice. Squeeze some lime juice over the top and mix together.
  8. Once your chicken is all cooked in your crockpot, take a fork and shred the chicken directly in the crockpot. Then pour ingredients over cauliflower rice. Slice an avocado and put that on top.
  9. Consume!!!


Thursday, February 7, 2013

Wednesday, February 6, 2013

Cupcakes!

OK, yes, I'm lame, and I'm sharing recipes I've already shared. But, I figure if it's here on the blog, with good labels, it will be nice to be able to find it quickly one of these days.

Since I had left over frosting from cupcakes last week, we made a new batch tonight. We added sprinkles, candles and a rendition of Happy Birthday.


  1. Pulse together dry ingredients in a food processor
  2. Pulse in wet ingredients
  3.  with paper liners
     and scoop ¼ cup into each
  4. Bake at 350° for 15-18 minutes
  5. Cool and serve

(I added some chocolate chips for some bite of pure chocolate in the cupcakes.)


2 avocados, peeled and pitted
1/2 cup cocoa powder
1/2 cup honey
2 tablespoons of coconut oil (needs to be warmed for good mixing)
1 teaspoon vanilla extract
1/2 teaspoon salt

1. Blend avocados, cocoa powder, honey, coconut oil, vanilla, and salt together in the food processor until smooth. 

Tuesday, February 5, 2013

Favorite Paleo Snacks

I'm slightly addicted to cooking. I get the kitchen clean, look up and the clock and decide I have time to make one more Paleo treat. Kitchen becomes a mess, again, especially when I have helpers at my toes. And, I'm frantically cleaning up the last of the mess as the babysitter arrives, and I sprint off to work.

In the spirit of reducing my cooking/preparing workload, here are some of my favorite ready-made Paleo snacks. Most of them make it easier to keep the kids Paleo, as they rarely have the patience to wait. If I've pre-planned, they may have a better Paleo snack available, but these are great to have on hand in a pinch.

Lara Bars - most are Paleo, though watch for some containing peanuts (I've made these at home, too, and they are very good. Will post on that, maybe tomorrow)


Simple Truth Natural Exotic Root Vegetable Chils: These are Kroger's organic brand version of the Terra chips. They are just a delicious, and cost about $0.10 less per ounce. 


Stretch Island Fruit Leathers: These are mostly for the kids' lunch boxes. They are available at Kroger, but cheaper on Amazon in bulk. All fruit! 


Dried Sweet Baby Pineapple: My only other Paleo friend commented, "who needs candy?" when she tried these. Available at Trader Joe's. We are also big fans of the Just Mango slices at TJ's. 


Hope to post about some great homemade snacks soon! 


Monday, February 4, 2013

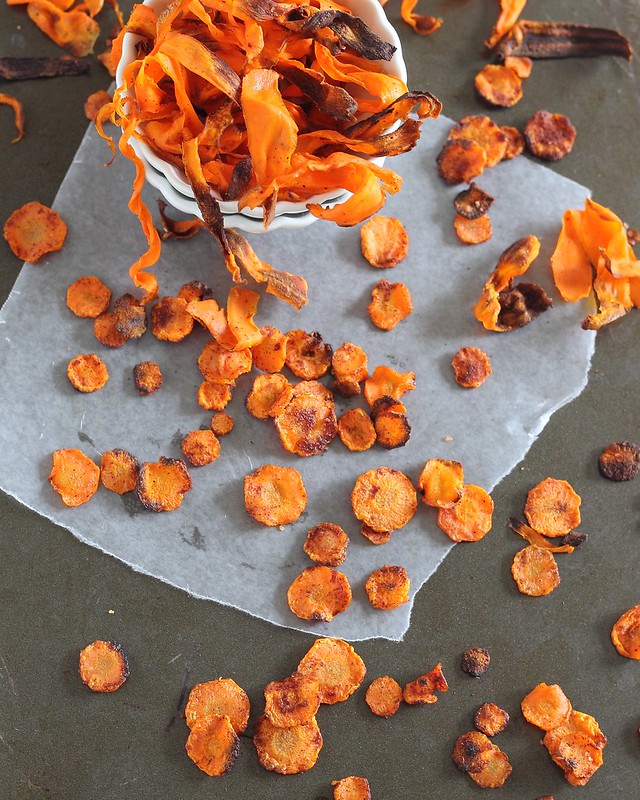
HOMEMADE CRISPY CARROT CHIPS


I wanted this:  crispy chips.


 But I got this:  roasted carrots.


I had carrots chips in the fridge which seemed like a good idea, but I guess they need to be very, very thin.  I'll try again by using my handy mandoline with whole carrots.   The link below shows the right result.


Here's the recipe from www.runningtothekitchen.com

Crispy baked carrot chips: 2 ways
Prep time
Cook time
Total time
A crispy, healthy vegetable chip.
Author:
Serves: 2
Ingredients
Sweet carrot chips
  • 1 carrot, sliced very thinly into rounds
  • ½ tablespoon melted coconut oil
  • pinch of kosher salt
  • cinnamon (I used about ½ teaspoon for a “light” cinnamon taste)
Spicy carrot chips
  • 2 carrots, shaved into peels using a vegetable peeler
  • ½ tablespoon melted coconut oil
  • pinch of kosher salt
  • ½ teaspoon ground pepper
  • ¼-1/2 teaspoon cayenne pepper (depending on heat preference)
Instructions
  1. Preheat oven to 425 degrees and line a baking sheet with parchment paper.
  2. Combine carrots (either rounds or peels depending on which version you’re making) in a medium bowl with coconut oil & spices. Toss to combine.
  3. Transfer to the baking sheet and arrange in a single layer.
  4. Bake for 10-12 minutes, watching carefully. Chips can go from crispy to burnt in as little as a minute since they are so thin.
  5. Remove from oven and serve immediately.

Friday, February 1, 2013

Shaved Brussels Sprout Salad

I got this recipe off of Food52, a non-Paleo food blog.   It looked like a great way to change up Brussels sprouts, but I had to alter it to make it Paleo. 

http://food52.com/recipes/7650-shaved-brussels-sprout-salad-with-red-onion-lemon-and-pecorino

The original recipe: 

Serves 6


  • 1/2 small red onion
  • Juice of 1 lemon
  • 1 teaspoon honey
  • 1 teaspoon whole grain mustard
  • Salt and freshly ground black pepper
  • 1 tablespoon olive oil
  • 3 cups Brussels sprouts (use larger sprouts if possible)
  • 1/2 cup finely grated pecorino romano
  1. Soak the onion slices in a small bowl of cold water for 15 to 20 minutes while you prepare the rest of the ingredients.
  2. In a small bowl, whisk together the lemon juice, honey, mustard and a pinch of salt and pepper. Whisk in the olive oil until the dressing is emulsified. Set aside.
  3. Trim all of the Brussels sprouts, cutting off any bruised outer leaves and slicing off a good portion of the hard root end. Using a mandoline, shave the sprouts one at a time. When you're done, use your fingers to gently separate the leaves so that the shredded sprouts resemble a very fine slaw.
  4. Put the sprouts in a serving bowl and toss gently with the onions (which you've now drained) and the dressing. Fold in the pecorino, taste and adjust seasonings if necessary. Serve immediately, before it starts to wilt! 


I obviously took out the cheese, but I added bacon and some warm bacon grease.  I also thinly sliced each Brussels sprout on a mandoline.   You can buy it already sliced in a bag at Trader Joe's.    I recommend. 

When I try it again, which I will, I'll blanch the Brussels sprouts first.  Drop them into boiling water for one minute, then take them out and run cold water over them immediately.  I generally prefer raw food like that blanched.  Personal taste.   


Crappy picture, but tasty food. 


David later added cheese because he truly thought it would make it better.  It did nothing.   The sprouts are too strong for the cheese.  It's a waste of a cheat, if you're so inclined.